Tools are an important part of an artist’s process. Some artists can be defined by the tools they use. But really, they are just that, tools. Used to complete a task. Tools do not a craftsman make. That being said, choosing the right tool over another to complete a task more efficiently is crucial to the creation process. Which is why artists form preferences for their tools of choice and ultimately choose one over the other.
It’s not about the tools you use, but the person behind them. Here are the tools I use in my Handlettering process;
- Sakura Pigma Micron Pens

These pens are almost the industry standard when it comes to Handlettering. For good reason, they are reliable, no streaks or patches when doing intricate work where precision is needed. They come in packs of 10, with different stroke weights, along with 2 extra pens; a brush pen and a graphic pen. The quality of the ink is unsurpassed compared to other pens I have used for lettering.
The Micron brush pen leaves a lot to be desired, and becomes flayed after only a few uses. I would recommend the Tombow Fudenosuke brush pens.
- Sai Japanese Watercolour Brush Pens

If you are looking to introduce some colour into your lettering artwork, I would recommend these watercolour brush pens. The pens use a fluid paint/ink hybrid. You can add more water to the liquid and it becomes more fluid and watercolour-like. Difficult to use at first and because the pens are slightly more water-based they can cause ‘seeping’ through the pages that you are drawing on.
In summary, they are a brush pen that uses watercolour instead of ink.
- Staedtler Lead Holder & Leads

This is the best ‘pencil’, I have ever used, a bit more expensive than a regular pencil, but with a comfortable grip, the ability to extend or shorten the lead to what is comfortable to you when performing your work. The Mars Carbons come in different weights, I use 2H & HB leads. One for outlining and a one for going over the outline. The replacement leads come in packs of 12.
The advantages of a lead holder are; its ability to retract the lead to a comfortable position and also provides protection for the lead if you are travelling with it, its grip, and the secret extractable sharpener on the top.
- Staedtler Rotary Eraser

This is an eraser like you’ve never seen before. Designed for lead holders, it leaves leads ultra sharp, ready for use on your most precise artwork. It features 2 smaller holes opposite the main eraser hole, which are used for defining how thick/sharp you want your lead to be before sharpening. It also features a ‘duster’, which allows you to remove any residual dust from tip of the lead after sharpening.
- Faber-Castell Eraser Shield

A surprisingly useful tool. Allows for precision erasing around edges and curves. If you think just an eraser is good enough, it’s not. This tool allows you to get a really sharp, crisp handlettering finish to your work before you begin to ink. Great at getting rid of small specs or imperfections and truly making your work look tidy.
- Huion A4 Lightbox

An A4 sized platform with a backlight, perfect for practicing handlettering with existing typeface. Print out a sheet of an upper and lower-case typeface and use it for practicing. With practice, you will be able to draw the style from memory.
It’s powered straight from the mains and has adjustable brightness settings for working in various lighting situations. A great piece of equipment for beginners or professionals that wish to learn a new lettering style from existing fonts.
- Daler Rowney Watercolour Brushes
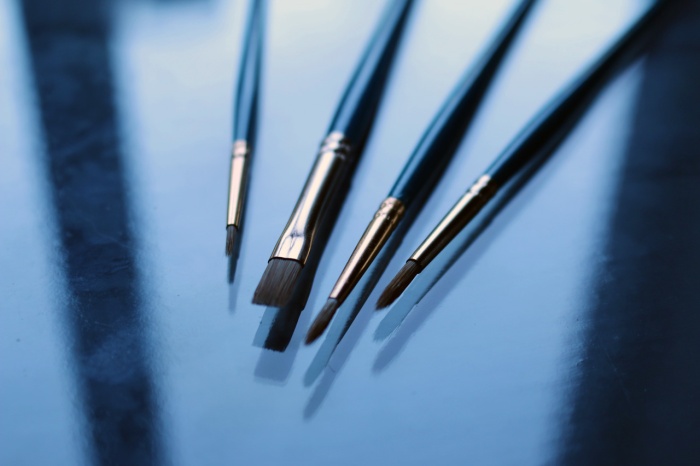
Watercolour brushes I use for freehand lettering. Thick, good quality horse-hair brushes that last a long time. They come in many shapes, although I like to use the smaller-tipped brushes, there is more control over the lettering style you wish to achieve.
- Daler Rowney FW Acrylic Ink

My favourite inking tool. It’s a hybrid between paint and ink, making a smoother, easier to use colouring medium for lettering. The colours are strong, with no fading. I would recommend using horse-hair brushes with Acrylic Ink paint. It holds the paint on the brush better unlike synthetic brushes, which is why I would use watercolour brushes, mentioned above.
The pot makes for a lovely decorative piece in the final lettering image. The top is rubber and acts as a suction bulb to absorb ink and place it delicately on a colour palette instead of awkwardly spilling the ink out of the pot.
- Paper

The paper you use isn’t that important. Standard A4 printer paper is what I use to sketch and practice styles before moving to the Daler Rowney Cartridge or HeavyWeight A5 paper. A beautiful series of papers, that are thick, premium cut, weighing 80/lbs and 135/lbs, perfect for pencil and final artworks. I use these papers for a final piece.
For my freehand lettering using the FW ink, I use Windsor & Cottman Watercolour 140/lbs paper for the final artwork. Perfect for water-based inks, the ink doesn’t run and absorbs into the paper beautifully. It has a textured finish which allows for a rich final artwork.


You must be logged in to post a comment.